

So we went back home to find that it wont allow us to upgrade and run latest Andriod and we had to wait. My friend Rishabh Dangwal (Good Rev Engg) said "We have to nail it". And this is how we give you Jailbreaking HTC Wildfire.
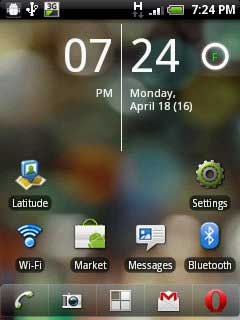
Before ROOTING (HTC Wildfire with Android 2.2.1)
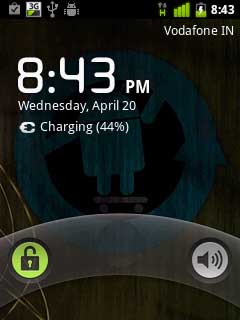
After ROOTING (HTC Wildfire with latest Android 2.3)
Before we begin, you need following things in place,
* HTC wildfire with S-OFF , HBOOT 1.01.0002 , OS Froyo 2.2.1
* USB Drivers
* RUU Rom 2.1 / RUU_Buzz_HTC_WWE_1.14.405.2_R_Radio_13.45.55.24_3.35.15.31_release_130814_signed
* Unrevoked 3.2 Test version
* Cyanogenmo 7 and Google Apps
* Time and Patience & last but not the least,
* Balls of Steel
Now for the tut.
Step 1: Installing the USB Drives
The first thing we need to do is download USB drivers and extract them on desktop.
Turn off your wildfire and boot into HBOOT by holding the VOLUME DOWN + POWER button.
Connect your phone to your PC and it will show "drivers installing" or similar there for Android device. When prompted , install the drivers by going to device manager and browsing to the folder where you extracted the drivers. Once installed, disconnect and reboot your phone normally.
Now you need to install the Android bootloader interface. Connect it to your HTC wildfire to the PC and it will ask for drivers again, Now go to device manager, click on unknown device;
click on update driver -> install from specific location -> No i will choose to install -> choose Android phone and click on adb interface -> click next -> when asked to install click on continue anyway, just install them.
Once done you will see your phone recognized as "Android bootloader interface". Now disconnect your phone and go into
settings -> applications - > development - > enable USB Debugging.
Congratulations, the first step is completed now.
Step 2: Downgrading from Android 2.2.1 Froyo to Android 2.1 Eclair
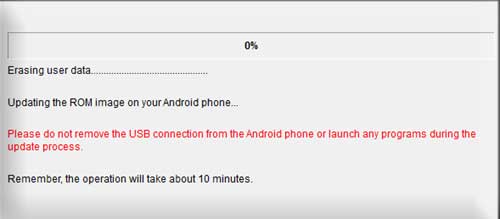
Download the RUU rom which is an original stock rom. Plug your phone into the PC and set it to "Charge through USB".
Double click RUU rom .exe.
Follow the on screen instructions and then let it install. Your phone will reboot into stock HTC 2.1
The HBOOT version will be now 0.80.0002 (check it by powering on your phone by holding the VOLUME DOWN + POWER button). Once done disconnect your phone.
Step 3: Gaining root using UnrEVOked
Download the test version of unrevoked. Let me repeat, DO NOT USE UNREVOKED 3.32 as it will lead to CID errors or to be precise this error;
"validation error backup cid is missing"
This may be caused as the 3.32 doesnot support HBOOT 0.82.0002. Hence You need specific test version of Unrevoked 3.2 to do the job.
Download it, save it on desktop, and run it. Now connect your phone and the rooting will start. Once donw, you will have Clockworkmod recovery installed on your phone.
Reboot your phone now (using the VOLUME UP/DOWN key for navigation and clicking using TRACKBALL, the POWER button takes you back in menus).
Once rebooted, you will see the superuserapp in your phone and congratulations, your phone is successfully rooted
Step 4: Installing Cyanogenmod 7 or Android Gingerbread 2.3.3
Download the Cyanogenmod 7 with google apps and save it on desktop.
Connect your phone as USB diskdrive and transfer both zip files on SD card.
Once done, reboot your phone into ClockworkMod Recovery (booting by holding the VOLUME DOWN + POWER button and clicking on recovery)
Once the device boots into the ClockworkMod Recovery, use the side VOLUME buttons to move around, and either the POWER button or the TRACKBALL to select.
* Select the option to Wipe data/factory reset.
* Then select the option to Wipe cache partition.
* Select Install zip from sdcard.
* Select Choose zip from sdcard.
* Choose update-cm-7.0.0-buzz-signed.zip & Let it install.
* Once done, Select Install zip from sdcard.
* Select Choose zip from sdcard, choose gapps-gb-20110307-signed.zip
* Once the installation has finished, to get back to the main menu by clicking the POWER button and select the Reboot system now option
Congratulations !
Now your HTC Wildfire should now boot into CyanogenMod as shown in screen below.

Acknowledgments
Special thanks to 3xeno. Greetz fly to Singla | Parul | Nilesh | Satwik Bhai | Broken Angel | Rahul Bhai
Tutorial Written and tested by:
-Rishabh Dangwal
theprohack
techden
Tutorial Edited by:
-Broken Angel
Edit Note: Link Change.